Are you a beginner in the world of macrame and wondering if there are patterns specifically designed for you? Look no further! In this article, we will explore the exciting world of macrame and unveil a wide range of macrame patterns for beginners like you. Whether you’re interested in creating wall hangings, plant hangers, or even jewelry, there’s a macrame pattern out there that will guide you step by step through the process. Get ready to unleash your creativity and embark on a macrame journey that is both fun and satisfying.
Yes, there are plenty of macrame patterns that are perfect for beginners! Macrame is a wonderful craft that involves creating beautiful designs by knotting cords together. It may seem complicated at first, but once you learn a few basic knots, you’ll be amazed at the variety of projects you can create. In this article, we’ll explore some macrame patterns specifically designed for beginners, as well as provide tips and tricks to help you get started. So let’s dive in and discover the world of macrame!
Benefits of Macrame for Beginners

Before we delve into the patterns, let’s talk about the benefits of macrame for beginners. Macrame is not only a creative and enjoyable craft, but it also offers several advantages for those who are new to the art form.
First and foremost, macrame is a highly versatile craft. You can create a wide range of items, including wall hangings, plant hangers, bracelets, keychains, bags, and much more. This variety allows you to explore different projects and find what suits your interests and style best.
Additionally, macrame is a budget-friendly craft. The materials needed for macrame, like cords and beads, are affordable and readily available. You don’t have to worry about investing a lot of money in expensive tools or supplies. Macrame allows you to create beautiful pieces without breaking the bank.
Moreover, macrame is a portable craft, which means you can take it with you wherever you go. Whether you’re traveling or simply want to take your macrame project to your favorite cafe, all you need are a few cords and your knots. It’s a great way to pass the time and unwind while creating something beautiful.
Lastly, macrame is a meditative and mindful practice. As you focus on the repetitive motions of knotting, you can enter a state of flow and relaxation. It allows you to disconnect from the digital world and find solace in the rhythmic process. Macrame can be a therapeutic activity that helps reduce stress and promotes mindfulness.
Materials Needed for Macrame

Now that we’ve discussed the benefits, let’s talk about the materials you’ll need to get started with macrame. Fortunately, the list of materials is quite simple, and most of them are readily available at craft stores or online.
- Macrame cords: The primary material for macrame projects is cords. These cords are available in various materials like cotton, nylon, hemp, or synthetic fibers. For beginners, it’s recommended to start with cotton cords as they are easy to work with and provide a nice texture.
- Scissors: A good pair of sharp scissors is essential for cutting the cords and trimming the ends. Make sure to have a dedicated pair of scissors for your macrame projects to keep them clean and in good condition.
- Beads: Adding beads to your macrame designs can enhance the overall look and add a personal touch. You can find a variety of beads in different shapes, sizes, and materials, so choose the ones that resonate with your style.
- Macrame board or tape: While not necessary, a macrame board or tape can be beneficial, especially for larger projects. It helps keep your cords in place and prevents them from tangling as you work.
With these essential materials, you’re well on your way to creating beautiful macrame projects. Now let’s explore some basic macrame knots that every beginner should know.
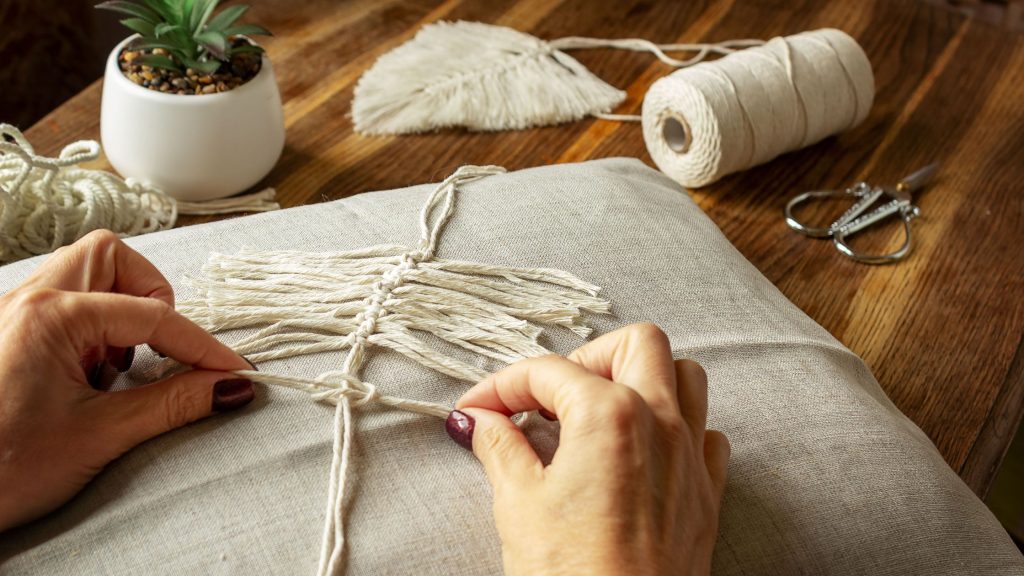
Basic Macrame Knots for Beginners
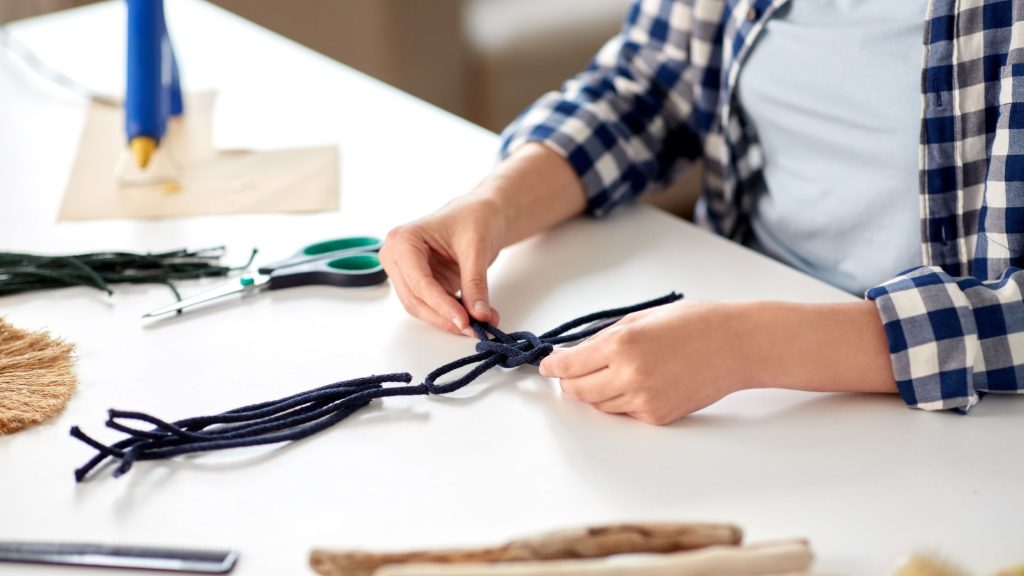
When it comes to macrame, learning a few basic knots forms the foundation for all your future projects. These knots will enable you to create a variety of patterns and designs. Here are three essential macrame knots for beginners:
- Square Knot: The square knot is one of the most common knots used in macrame. It creates a flat, woven pattern and is perfect for creating textures in your designs. To make a square knot, follow these steps:a. Take two cords and cross the left one over the right one.
b. Pass the left cord under the right cord and through the loop created on the right side.
c. Pull both cords tight to create a square knot.
By repeating these steps, you can create rows of square knots in your macrame projects.
- Lark’s Head Knot: The lark’s head knot is commonly used to secure cords to a dowel or ring. It’s a simple knot that allows you to hang your macrame pieces. To make a lark’s head knot, follow these steps:a. Fold a cord in half and place it under the dowel or ring.
b. Bring the looped end over the dowel and through the loop on the other side.
c. Pull both ends of the cord to tighten the knot.
This knot creates a looped attachment point for your macrame cords.
- Half Hitch Knot: The half hitch knot is used to create diagonal or angled patterns in macrame. It’s a versatile knot that adds movement and texture to your designs. To make a half hitch knot, follow these steps:a. Take one cord and place it diagonally over the working cord.
b. Bring the cord underneath the working cord and through the loop created on the left side.
c. Pull the cord tight to create a half hitch knot.
Repeat these steps with different cords to create a series of half hitch knots.
These three basic knots are the building blocks of macrame. Once you master them, you can combine them in various ways to create intricate designs. Now, let’s explore some simple patterns specifically for beginners.
Simple Macrame Wall Hanging Patterns

Wall hangings are a popular macrame project, and they can instantly add a bohemian touch to any space. Here are two simple macrame wall hanging patterns that are perfect for beginners:
- Diamond Wall Hanging: This elegant design features a diamond-shaped focal point surrounded by intricate knot patterns. To make this wall hanging, you’ll need cords, a dowel or branch, and scissors. Here’s how to create it:a. Cut eight cords of equal length and fold them in half.
b. Attach the folded ends to the dowel using lark’s head knots.
c. Divide the cords into four pairs. Take the first pair on the left and make a square knot.
d. Repeat the square knot with the second and third pairs, leaving the fourth pair untouched.
e. Take the first pair from the left and combine it with the second pair to make another square knot.
f. Repeat this process, working your way from left to right until you reach the center.
g. Do the same for the pairs on the right side, creating a mirror image of the left side.
h. Lastly, secure the ends of the cords by trimming them evenly or creating a fringe.
With these steps, you’ll have a beautiful diamond wall hanging to adorn your space.
- Leaf Wall Hanging: This nature-inspired wall hanging adds a whimsical touch to any room. For this project, you’ll need cords, a dowel or branch, scissors, and optionally, beads. Follow these steps to make a leaf wall hanging:a. Cut several cords of varying lengths. Fold each cord in half and attach them to the dowel using lark’s head knots.
b. Take two adjacent cords and create a square knot to secure them together.
c. Move to the next pair of adjacent cords and repeat the process, keeping a consistent spacing between the knots.
d. Continue this pattern until you reach your desired length.
e. Next, create leaf shapes by grouping cords together and securing them with square knots.
f. You can add beads to the leaf shapes to enhance their appearance.
g. Trim the ends of the cords evenly or create a fringe to finish off the wall hanging.
With these steps, you’ll have a lovely leaf wall hanging that brings the beauty of nature indoors.
Easy Macrame Plant Hanger Patterns
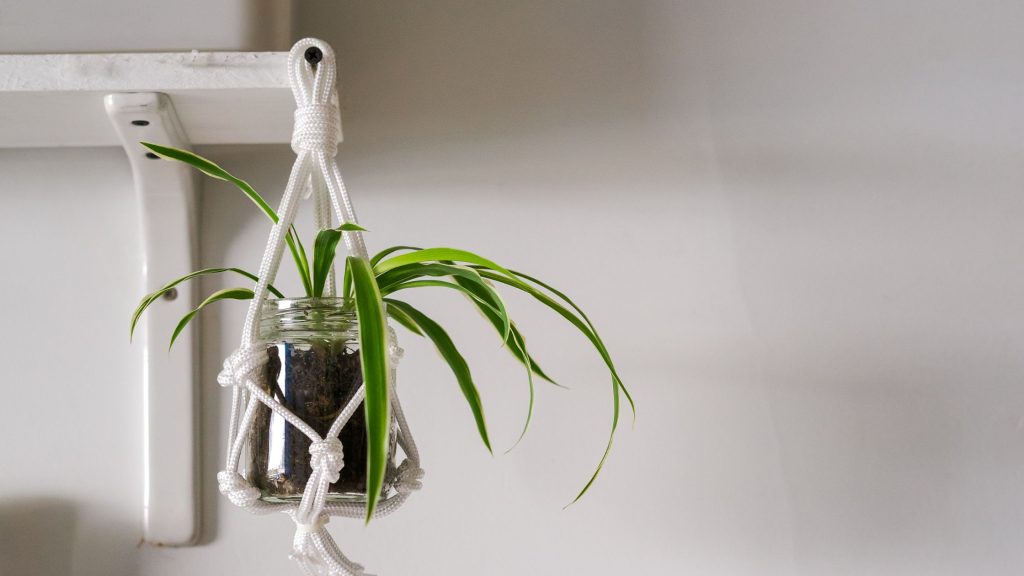
Macrame plant hangers are not only functional but also add a touch of greenery to your living space. Here are two easy macrame plant hanger patterns that beginners can try:
- Classic Macrame Plant Hanger: This timeless design is simple yet elegant, making it ideal for beginners. To create this plant hanger, you’ll need cords, a ring, scissors, and a plant pot. Follow these steps:a. Cut four cords of equal length and fold them in half. Attach the folded ends to the ring using lark’s head knots.
b. Separate the cords into pairs. Take the first pair on the left and create a square knot.
c. Repeat the square knot with the second and third pairs, leaving the fourth pair untouched.
d. Combine the first and second pairs to create another square knot.
e. Repeat this process until you reach your desired length.
f. Once you’ve reached the desired length, gather all the cords and tie them together with an overhand knot.
g. Place your plant pot inside the hanger, adjust the length of the cords if needed, and hang it from a hook or ceiling.
Voila! You have a classic macrame plant hanger ready to display your favorite plant.
- Double Half Hitch Plant Hanger: This plant hanger features a unique pattern created by double half hitch knots. Grab your cords, a ring, scissors, and a plant pot, and follow these steps:a. Cut six cords of equal length and fold them in half. Attach the folded ends to the ring using lark’s head knots.
b. Divide the cords into three groups of four cords each.
c. Take the left group of cords and create a double half hitch knot around the second group of cords.
d. Repeat the double half hitch knot with the right group of cords, working around the second group.
e. Continue this pattern until you reach your desired length.
f. Gather all the cords and tie them together with an overhand knot.
g. Place your plant pot inside the hanger, adjust the length of the cords if needed, and hang it up for all to admire.
With these steps, you’ll have a beautiful double half hitch plant hanger showcasing your green thumb.
Beginner-Friendly Macrame Bracelet Patterns

If you’re interested in making jewelry, macrame bracelets are a great place to start. Here are two beginner-friendly macrame bracelet patterns that you can easily create:
- Simple Braided Bracelet: This bracelet features a classic braided pattern and is perfect for everyday wear. Gather your cords, scissors, and optional beads, and follow these steps:a. Cut three cords of equal length and fold them in half. Attach the folded ends to a ring or clipboard using lark’s head knots.
b. Separate the cords into three groups of two cords each.
c. Take the left group of cords and cross the right cord over the left, creating an X shape.
d. Cross the left cord over the X shape, tucking it under the right cord.
e. Pull the left cord through the loop created on the right side, tightening the knot.
f. Repeat this process, alternating between left and right groups of cords, until you reach your desired length.
g. Tie the ends of the cords together with an overhand knot and trim any excess.
With these steps, you’ll have a simple braided bracelet that adds a touch of elegance to your wrist.
- Beaded Macrame Bracelet: This bracelet incorporates beads into the macrame design, giving it a unique and personalized look. Gather your cords, beads, scissors, and a button or bead for the closure, and follow these steps:a. Cut two cords of equal length and fold them in half. Attach the folded ends to a clipboard or use tape to hold them in place.
b. Cross the left cord over the right, creating an X shape.
c. Take the left cord and thread a bead through it.
d. Bring the left cord behind the right cord and cross it over the X shape.
e. Thread another bead through the left cord.
f. Repeat steps c and d until you’ve added your desired number of beads.
g. Continue knotting without beads until you reach your desired length.
h. For the closure, thread the cords through a button or bead, tie an overhand knot, and trim any excess.
With these steps, you’ll have a beaded macrame bracelet that reflects your unique style.
Step-by-Step Macrame Bag Tutorial for Beginners
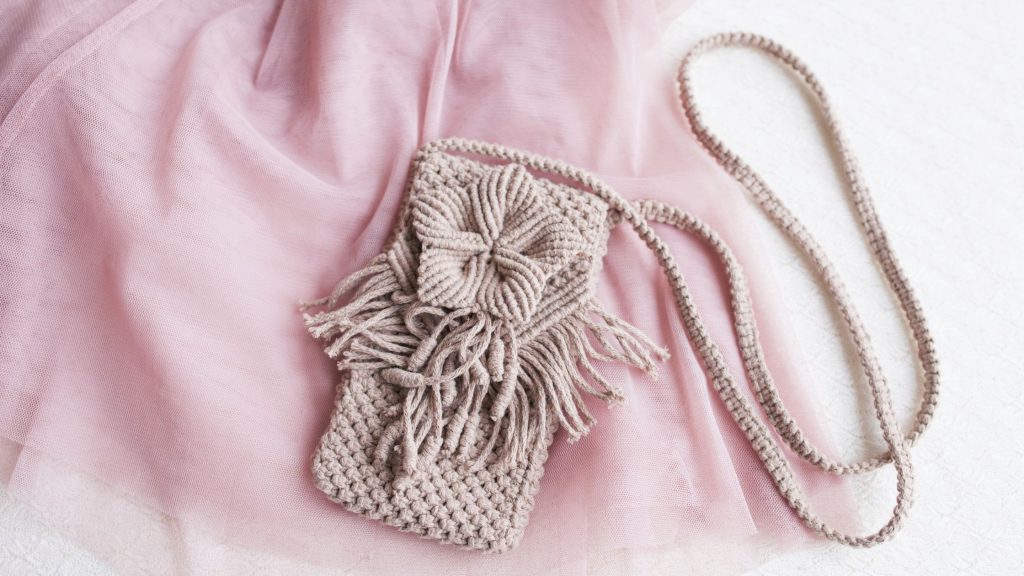
If you’re feeling more ambitious and want to tackle a larger project, a macrame bag is a great choice. Here’s a step-by-step tutorial to help you create your very own macrame bag:
- Gather your materials: You’ll need a sturdy cord such as cotton or nylon, a large wooden ring, scissors, and optionally, a lining fabric.
- Cut the cords: Start by cutting around 40 cords of equal length. The length will depend on the desired size of your bag.
- Attach the cords: Fold all the cords in half and attach them to the wooden ring using lark’s head knots. Ensure that the ring is secure and the cords hang evenly.
- Start the base: Divide the cords into four sections and create square knots using adjacent pairs of cords. Repeat this process until you have a solid base for your bag.
- Create the body: Once the base is complete, you can start creating the body of the bag. Create rows of square knots, gradually tapering the shape to create a bag-like structure. You can also incorporate other knot patterns to add texture and visual interest.
- Continue knotting: Keep knotting rows until you reach your desired bag height. Remember to periodically check the size and adjust the knots if needed.
- Finish the bag: When you’re satisfied with the height, gather all the cords and tie them together in a secure knot. Trim any excess cord and ensure that the knot is tight and secure.
- Optional lining: If you prefer, you can add a fabric lining to your macrame bag for extra durability and functionality. Measure and cut the lining fabric to fit the interior of the bag, carefully sewing it in place.
With these steps, you’ll have a fashionable macrame bag that’s perfect for carrying your essentials in style.
Macrame Keychain Patterns for Beginners

If you’re looking for a small and quick macrame project, keychains are a fantastic option. Here are two easy macrame keychain patterns that beginners can whip up in no time:
- Single Knot Keychain: This keychain features a simple yet stylish design using single knots. Grab your cords, a keyring, scissors, and follow these steps:a. Cut one cord of your desired length and fold it in half. Pass the folded end through the keyring and pull the loose ends through the loop.
b. Separate the cords into two groups. Take the cord from the left group and create a single knot around the right group of cords.
c. Repeat this process, alternating between the left and right groups, until you reach your desired keychain length.
d. Tie all the cords together with an overhand knot, add a drop of glue to secure it, and trim any excess cord.
With these steps, you’ll have a stylish keychain that adds a personal touch to your keys.
- Beaded Spiral Keychain: This keychain combines the beauty of beads with a spiral pattern. Gather your cords, beads, a keyring, scissors, and follow these steps:a. Cut one cord of your desired length, fold it in half, and pass the folded end through the keyring. Pull the loose ends through the loop to secure it.
b. Thread a bead onto both ends of the cord, sliding it close to the keyring.
c. Hold the keyring and cords together and twist them in one direction to create a spiral effect.
d. After a few twists, add another bead, sliding it close to the previous one.
e. Continue this process, alternating beads and twists until you reach your desired keychain length.
f. Tie all the cords together with an overhand knot, add a drop of glue to secure it, and trim any excess cord.
With these steps, you’ll have a beautiful spiral keychain that showcases your creativity.
Tips and Tricks for Beginner Macrame Artists
As a beginner macrame artist, it’s always helpful to have some tips and tricks to guide you along the way. Here are a few pointers to keep in mind as you embark on your macrame journey:
- Practice the basic knots: The key to mastering macrame is to practice the basic knots regularly. Spend some time each day creating knots and experimenting with different patterns. As you become more familiar with the knots, you’ll gain confidence and be able to tackle more complex designs.
- Start with simple projects: It’s best to start with simple projects as a beginner. Choose patterns that require minimal materials and use basic knots. As you gain experience and skill, you can gradually move on to more intricate designs.
- Use high-quality materials: Invest in good-quality cords and tools to ensure the longevity of your macrame projects. High-quality cords are easier to work with and produce better results. Additionally, using sharp scissors will make cutting the cords a breeze.
- Take breaks and stretch: Macrame involves repetitive hand movements, so it’s important to take regular breaks and stretch your hands and wrists. This will prevent strain and ensure that you can enjoy macrame for years to come.
- Seek inspiration: The macrame community is vibrant and filled with talented artists. Follow macrame artists on social media, join online forums, and participate in workshops to gain inspiration and learn from others. Sharing your work and receiving feedback can also help you grow as an artist.
- Embrace mistakes: Remember that mistakes are part of the learning process. Don’t be discouraged if a knot doesn’t turn out the way you envisioned or if a project isn’t perfect. Embrace the imperfections and use them as opportunities to learn and improve.
- Experiment and have fun: Macrame is an art form that allows for endless creativity. Don’t be afraid to experiment with different knots, patterns, and materials. Let your imagination run wild and have fun with your projects. The joy and satisfaction you’ll experience from creating something unique and beautiful are truly rewarding.
Conclusion
In conclusion, macrame is a wonderful craft that offers a wide range of patterns and designs for beginners. With just a few basic knots and some readily available materials, you can create stunning wall hangings, plant hangers, bracelets, keychains, bags, and more. Take the time to practice the knots, start with simple projects, and don’t be afraid to unleash your creativity. Remember to enjoy the process and have fun with this versatile and fulfilling craft. Happy knotting!